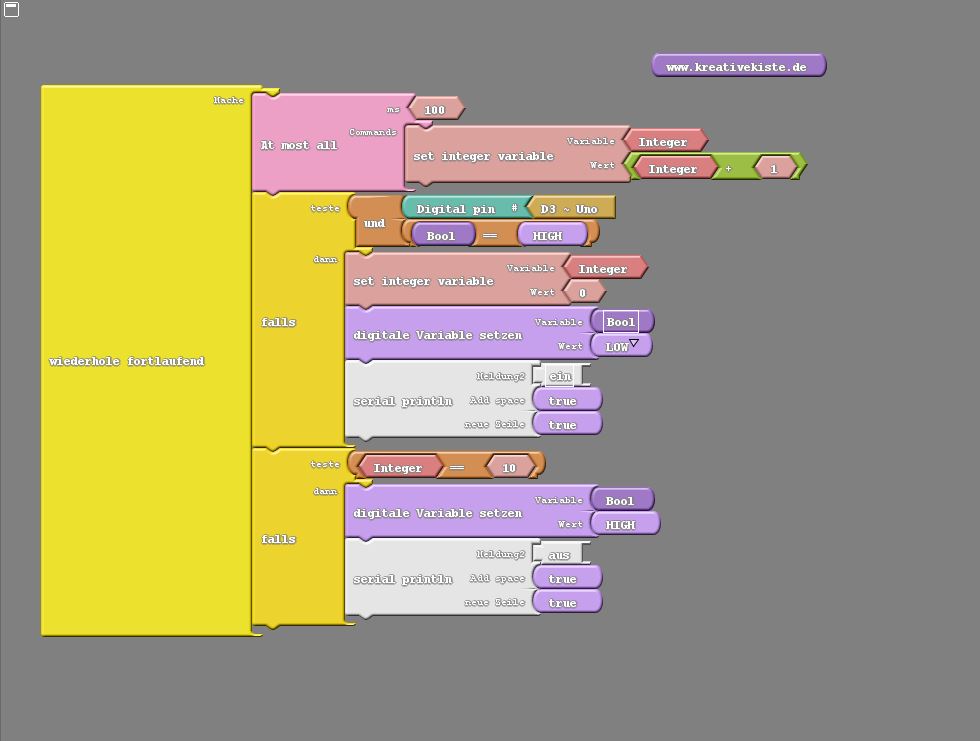
The "at most all" is one of the most important block in Ardublock. At least if you use the Ardublock "experimental" from duinoEDU. In the "experimental" version there are no blocks like "scoop" or "count state change". Only with the "at most all" earlier "only every" is it possible to do without "delay" blocks. Delay blocks are usually needed to make LEDs flash, to debounce buttons or to wait for the next input. "Delay" times slow down the Arduino extremely, because in a "delay" loop nothing else is done than waiting.
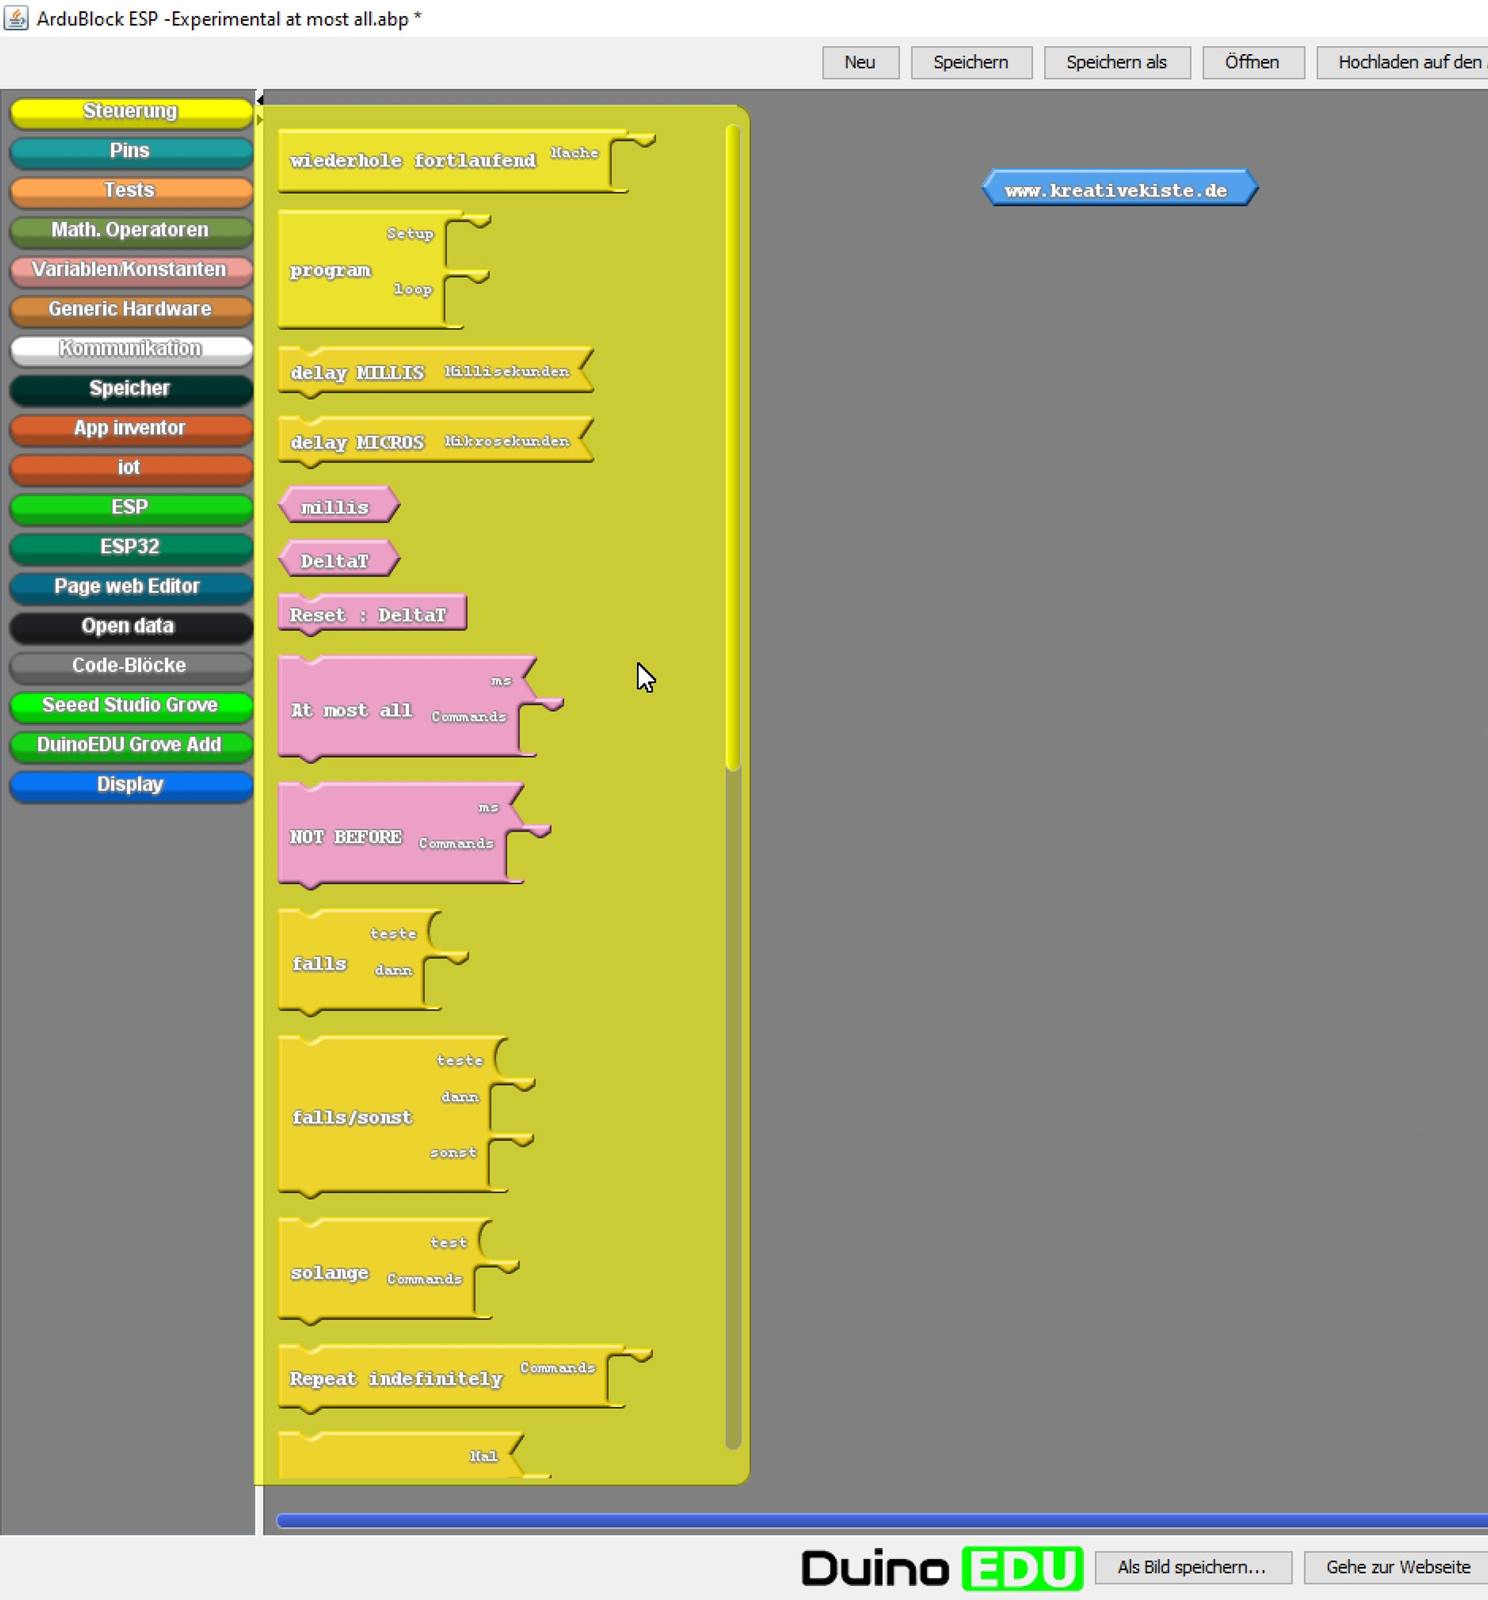
With the "at most all" block this problem can be solved easily but with a little effort. The buck is found in the yellow blocks of the control.
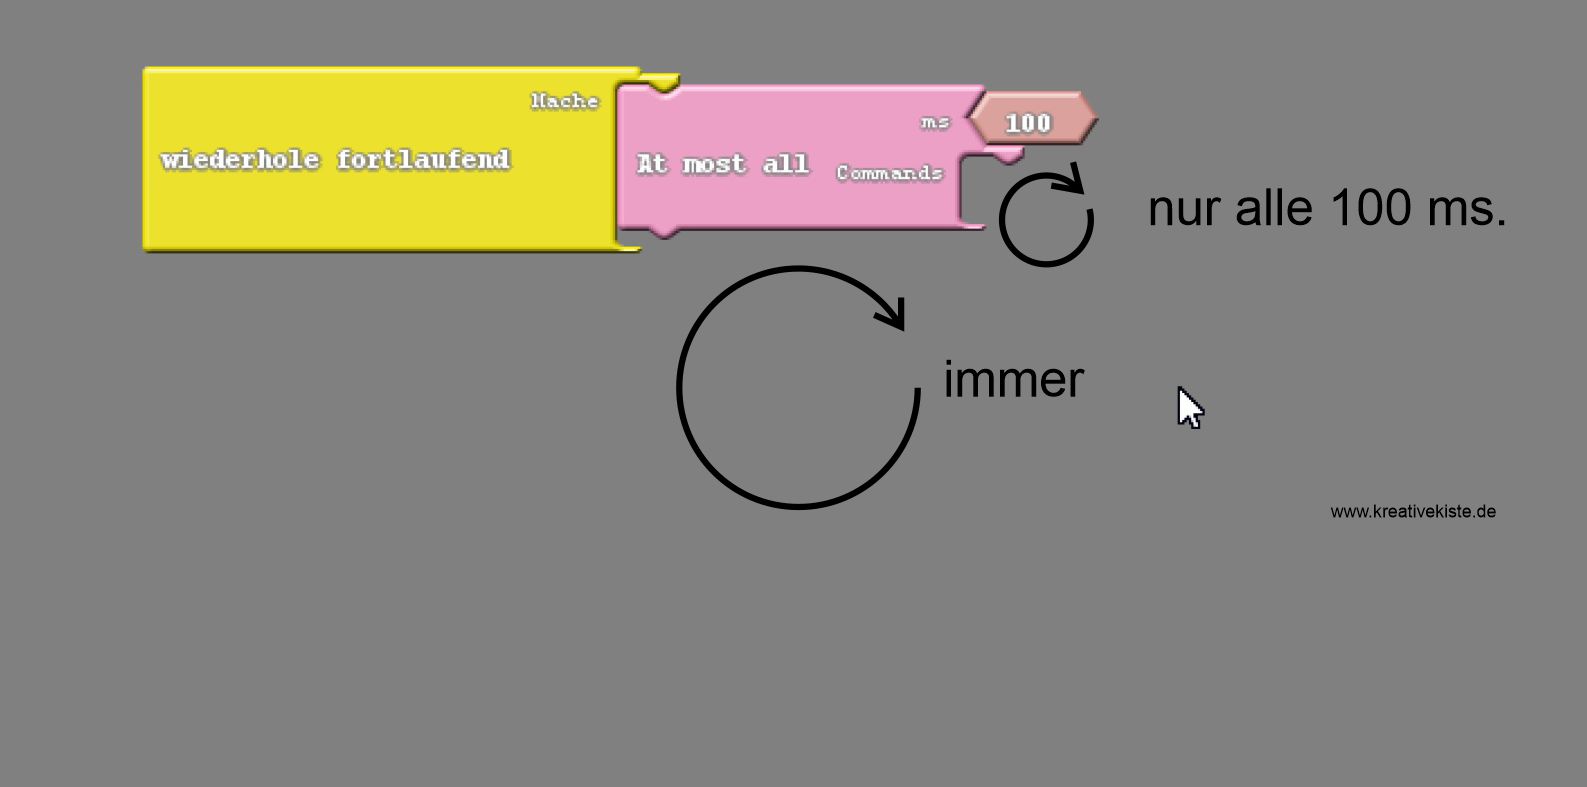
This block can be imagined as a counter that runs in the background. The program below the block "at most all" is like the normal Arduino program, all inputs are queried, outputs switched etc. The block "commands", on the other hand, is only every 100ms. (or what is entered in ms.) is repeated. ,
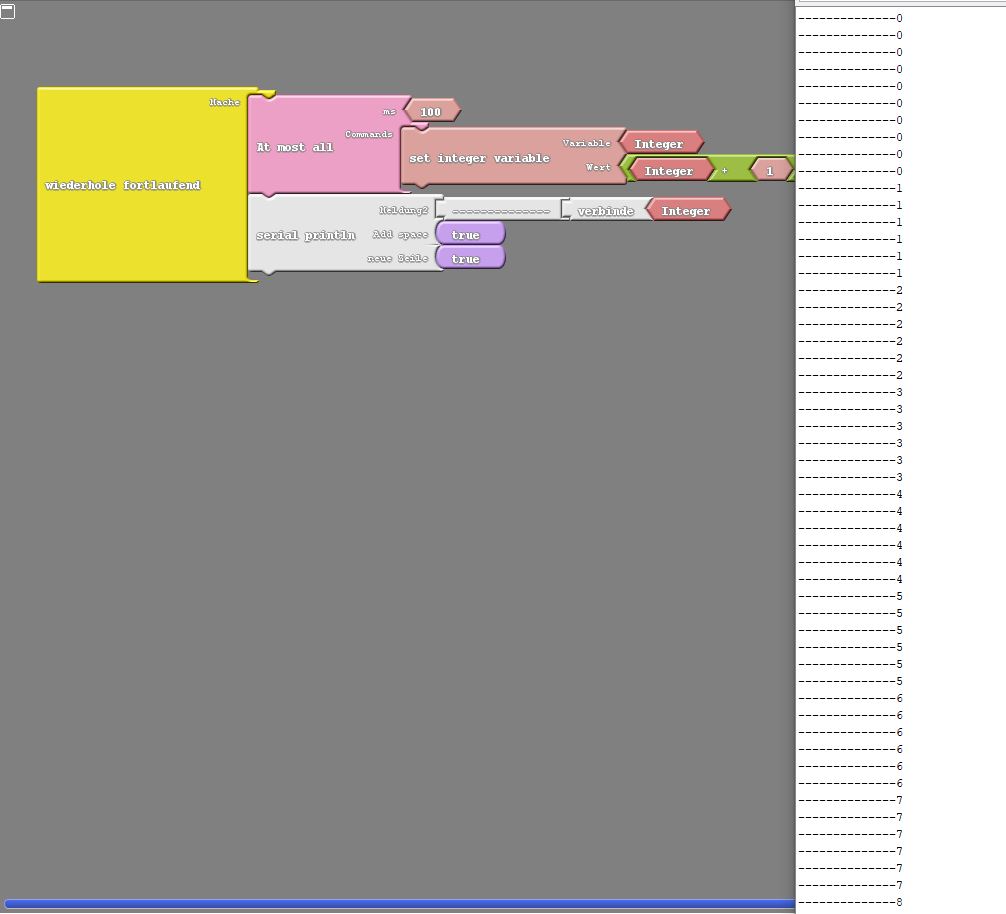
If you load the program below on the Arduino and open the serial monitor, you can see the counting of the "at most all" block and at the same time how often the "serial print" is output. We now have a timer that works independently of our rest of the program.
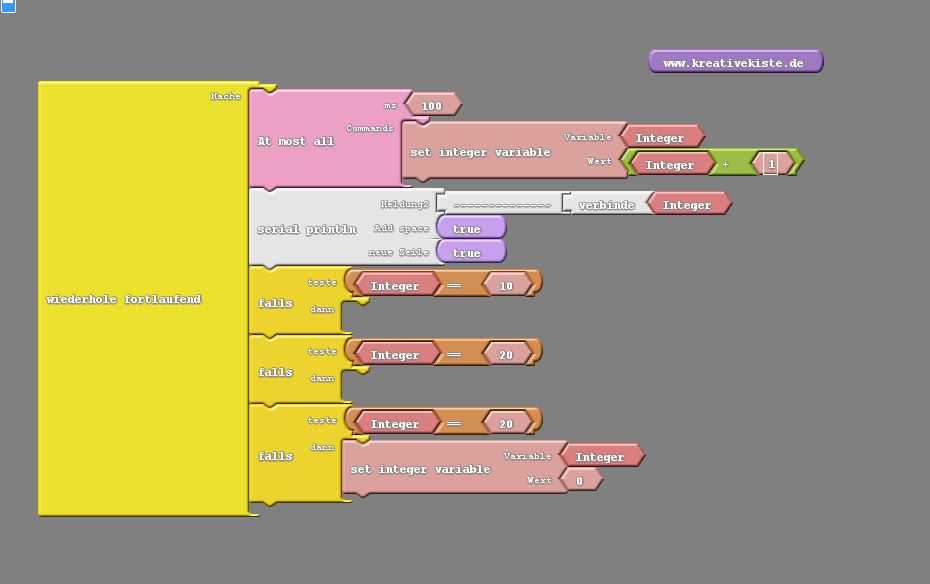
In order to be able to program with these times, the "fals" blocks are queried. It is only important to reset the counter or the variable at some point.
On the left in the picture how the whole thing looks for a blinking LED with "at most all" and on the right how the whole thing looks with "delay".
If the variable is 0, the LED is switched on. The "integer" variable is now counted up in the background. At 10 the LED is switched off and at 20 the variable is reset. The LED is on for 1 second and then off for 1 second. Instead of using 3 "if" blocks, you could simply write 10 and 20 in the first two "if" blocks, the result is the same. Here for testing I used 3 so that it can be seen better. Of course, this is a bit more effort BUT it is worth it because the Arduino, unlike the right code, does not waste any time resources.
However, if a button is to be debounced, the whole thing can look like this.
When the button is pressed, the variable of the counter is set to 0 and a digital variable to low. If the time has expired, the variable is set to HIGH again and the button can now be queried again. This means that the button cannot be called up and debounced for 1 second.
If you want to have different times or LEDs flashing and want to query buttons, you must of course have different times. Otherwise, the blinking rhythm would get mixed up when a button was pressed. Simply use different "at most all" blocks. One for the LEDs, for example, and one for the buttons. The code below can be uploaded once for testing.

